
copper foil
I hope you enjoy using these techniques in your work.
Please respect my copyright on this tutorial and my artwork. Jane Cather 2008
Before going to the copper foil technique I will start with a photo of the torch set up.

I turn the torch upside-down and heat from below primarily. There is a big hole in the screen which helps reduce the heat sink, but enough to hold the trivet. I keep the torch down at the base for awhile and gradually bring it up closer to the piece. I keep moving it around under the piece until I see the surface is smooth. I only heat from the top to ‘burn’ the enamel a bit for interest at times. I have a regular brick nearby and when I finish with the enamel I hit the brick with the torch to heat it a bit and then transfer the enamel piece with tweezers on to the brick to cool there. Sometimes if you grab the piece too quickly when it is still molten you will mark the enamel. (Which can be a technique too.) I believe this set up was in L. Darty’s book.
Now to the copper foil technique. The copper gauge is 36. It feels like heavy paper. It embosses with any kind of stylus.
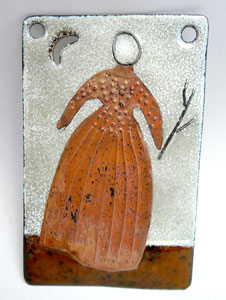
For this piece I cut out the dress and embossed it. There are 3 layers of enamel on the front. Ivory beige, white and then a transparent gray. They were fused and then I placed the copper dress, her wire head and wire stick on the top. I heated the enamel to molten again and they do begin to sink in and I assisted by pushing them down - working on one half and then the other. Tapping them down is more like it. When the piece is really hot the wire and the copper become so annealed that it doesn’t take much to tap them into the enamel. But remember to be careful not to push too hard and flip them off! The copper is exactly how it came out and I just waxed it. I did abrade the face area with a stone to whiten and clean the wire a bit. I filed down flush with the piece the ends of the wires in the stick. Picking at the edges all the way around the copper shape I find nothing you could lift up. You can pretty much see that it is ‘down’ in the glass (or not if it did not get all pushed in) This copper shape I did like with the wire and shaped it a bit against the back of the formed piece and laid it on the front to see if it was really going to stick up somewhere and then I would concentrate on that area when it was hot or bend it more first if possible. If I remember these arms stood well off the piece and were pushed in.
 “Moon Run” measures 2 x 3
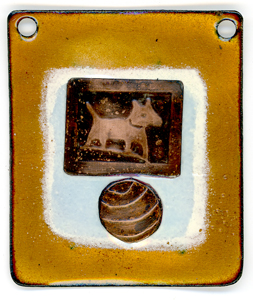
 “Have a Ball” 2 x 2 /14
Here I used one of my plates and rolled the copper for the dog and drew the ball with the stylus. The two were just sunk into the top of about 3 layers of enamel and had their highlights cleaned up and then waxed. The one with the woman is also rolled from one of my plates and the copper has had nothing done to it.
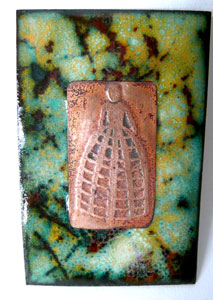
 2 x 3
2 x 3
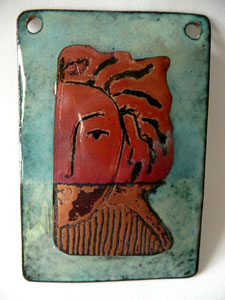
On the upper half of the copper shape I used a black under glazing pen in the recesses of the face and hair. Then put a transparent blue enamel over the copper (the copper had already been sunk into the previous layer). The bottom section of copper is untreated other than cleaned up a bit with sandpaper. The red on the actual piece is not as intense and interesting as it is on my screen! It is duller. I have not tried firing again alone or firing again with more enamel layers.
The unglazed copper can be cleaned and livered also. On the top half of the face the copper was cleaned, black under glaze pen put on, blue transparent enamel sifted over and then all fired. I would think that after the copper was sunk into the enamel if it was then put in the kiln you would get that great permanent black and could just lift out the high lights.....?
I tried 28g sterling that I rolled and it popped right off when it cooled. There was enamel on the back but it wanted to go straight flat again. Too hardened? I have not tried fine silver or making sure my silver was ‘softer’. But I will head here too as I think I would like copper and silver on there together. The copper shape that you are ‘adhering’ to the piece could have some silver already soldered or fused on it.......sliver wire could be sunk at the same time with copper shapes.....always something else to try! I may never actually make anything........ Here is an additional idea for the copper foil. Make it more dimensional.
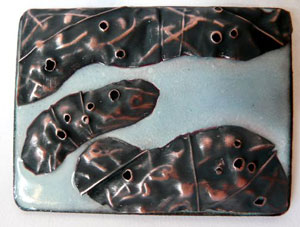
“Inlets” (arial view) 2 x 1 1/2 highest point of formed pieces is 1/8”
The copper has been fold formed, punched and dapped to create land masses in this case, but it could be anything. These shapes were sunk down in 3 layers of enamel. Nothing was added after this. The copper was cleaned up , livered and then highlights raised with sand paper.
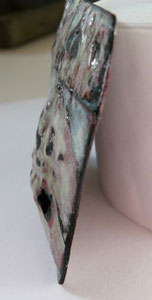
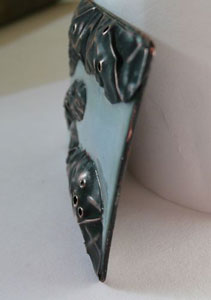 side view showing some of the raised areas
“another country” (arial view) 2 3/8 x 2 highest point of formed areas 1/4” Enamel has been put on the formed raised copper and fired after it was originally sunk in.
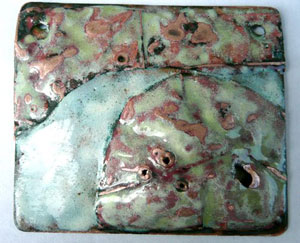
I like this idea but feel I need to work and develop it a bit more.........some of the copper could be raised and same flat......a little wire or bits of silver .........the bail would be a good bridge in silver.......... I am looking forward to trying out different combinations of the various techniques.
I hope you enjoy using these techniques in your work.
Please respect my copyright on this tutorial and my artwork. Jane Cather 2008